Leased line installation process in businesses
In the UK, it usually takes around 90 days to install a leased line, from procuring a service provider to fully integrating it with your business network.
However, this timeframe can be affected by permitting delays, engineering works, and complex integrations with existing systems.
This article outlines the entire leased line installation process, highlighting the key activities, common challenges and timeline estimates for each stage.
Leased line installation process:
- Provider procurement
- Site survey and ECCs
- Wayleave agreements and other permits
- Installation works
- Equipment installation and activation
- Network integration and go-live
Leased line installation process
Installing leased line business broadband is a multi-step process that requires coordination and planning.
At its core, it involves selecting a business broadband provider, who will work with the network operator to extend a dedicated fibre line from the nearest exchange directly to your premises. Once in place, this line must be integrated into your existing business network.
The complexity, cost, and level of support involved can vary significantly depending on factors like your location, the site’s ownership, your specific requirements, and local network availability.
The following sections delve into each point in more detail:
1. Provider procurement
Timeframe: 1–3 weeks.
Depends on: Number of providers considered, provider responsiveness, site location (urban vs rural), and administrative overheads.
To begin the leased line installation process, businesses must first choose from among the leased line broadband providers available at your location.
Doing so by using a business broadband comparison service is highly recommended as it will aggregate multiple quotes from vetted providers for you, saving you valuable time and energy compared to contacting each provider individually.
Desk based study
To provide you with a quote, each prospective business broadband provider will carry out an independent desk-based feasibility assessment before issuing a quote.
This is often referred to as an Openreach lookup, even though it also involves analysing alternative fibre infrastructure and browsing the broadband history at your property.
Providers will start by looking at whether a leased line is feasible at your location based on:
- Proximity to network infrastructure: How close your premises are to the nearest Point of Presence (i.e. closest telephone exchange or specialised leased line cabinet, if available)
- Existing fibre availability: See if there is existing infrastructure at your site and in the vicinity (e.g. ducts, poles, cables, or exchanges).
- Network capacity: Whether the existing fibre network is within capacity to support a new leased line.
- Installation complexity: Overall difficulty and risk, especially if new ducts need to be laid, or if the fibre route must cross private land, or listed property.
Desk-based study outcomes
The broadband provider will either deem your installation feasible or unfeasible:
- Unfeasible installation: If the installation appears too complex or costly, it will be deemed unfeasible and providers will suggest alternatives like full fibre or SoGEA with broadband redundancy, especially in rural or underserved areas.
- Feasible installation: If the necessary infrastructure is available at your site, your provider will contact you to determine the scope of your leased line (i.e. bearer capacity, speed, level of support, network integration, contract duration, etc) and issue you with a quote and a contract ready to sign without delay.
Analyse and sign a leased line contract
Once you’ve confirmed that installation is feasible and received a few quotes, the next step is to carefully review each leased line offer.
While many providers use the same Openreach infrastructure, their quotes can still differ significantly in terms of:
- Leased line costs: including both installation and ongoing service charges. Long-term contracts often waive installation fees.
- Service-level guarantees: Such as uptime commitments, performance guarantees, and response times for support.
Some local providers may also have access to exclusive infrastructure, such as low-contention altnet fibre networks or custom leased line cabinets. It’s always worth asking which network they’ll be using for your connection.
After selecting the best option, you’ll be asked to review and sign the business broadband contract.
All leased line contracts remain provisional until a site survey is completed. This survey may uncover the need for additional civil works (known as “excess construction”), which can affect both the cost and timeline.
Prepare for the installation
Signing your contract will give you your first estimated timeline, which will let you prepare for the installation in advance. Consider the following:
- Arrange temporary connectivity: For new sites or relocations, especially if the lead time extends over several months. Consider acquiring a temporary connection (e.g. cable broadband, SoGEA, 4G/5G, or even business satellite broadband). You can later use this connection for network load balancing or broadband failover.
- Initiate wayleave conversations: Engage landlords, managing agents, or legal teams early to prevent delays and anticipate issues.
- Review building plans and access routes: Pre-empt potential survey issues by checking comms rooms, risers, basements, or possible duct entry points with your building manager.
- Confirm site access: Including working hours, security clearance, lift access, and delivery logistics for engineers.
- Notifying internal IT or external partners: So they can coordinate the handoff, rack space, power supply, and integration requirements.
- Flagging special infrastructure constraints: Such as listed building status, shared service areas, or secure zones that could affect cabling.
- Planning around operational windows: To avoid disruption during critical business periods or restricted-access times.
2. Site survey and ECCs
Timescale: 1-3 weeks.
Depends on: Engineer availability, Openreach involvement, site access coordination, survey complexity, and presence of ECCs.
Site surveys are typically scheduled a few weeks after signing the contract, depending on the network provider’s availability.
The designated engineer/technician (usually from Openreach or a local Altnet like KCOM in Hull) may be accompanied by a representative from your selected broadband service provider.
Your business must ensure a facilities manager or someone with authority is available on-site to provide access during the survey.
Site survey activities
During the survey visit (usually a few hours), the technician/engineer will:
- Inspect existing duct entry points and determine whether new ducting or microtrenching is needed.
- Confirm the fibre route to your comms room or Optical Network Terminal (ONT) location.
- Identify any required landlord permissions, wayleaves, or permits.
- Assess physical obstacles or health and safety concerns.
- Check the condition of ducts from your premises to the nearest Point of Presence (PoP).
- Take photos, measurements, and consult with your site contact.
Excess Construction Charges
The site survey determines whether Excess Construction Charges (ECCs) apply. If the ECCs are too high, you have the right to walk away from the contract without incurring costs.
ECCs cover additional work beyond standard installation, such as:
- Civil engineering work: Microtrenching, roadworks, or new duct construction.
- Infrastructure upgrades: Replacement or enhancement of existing fibre elements (e.g. ducts, poles, cabinets, nodes).
- Custom routing: Needed to avoid physical obstacles, private land, or protected areas.
If ECCs apply, they will be detailed in the site survey report. You must review and approve these charges before any wayleave or permit applications begin.
If you’re quoted ECCs, consider:
- Negotiating: Some providers may be open to sharing costs or waiving ECCs in exchange for signing a longer-term contract.
- Alternatives: Consider a combination of products like full fibre and Starlink to bridge the gap while leased lines remain unavailable.
- Wireless leased lines: In some areas, direct wireless access can provide comparable performance and business-grade SLAs at a similar cost.
3. Wayleave agreements and other permits
Timescale: 1–8 weeks
Depends on: Landlord responsiveness, legal review time, property ownership (freehold vs leasehold), building type (e.g. multi-tenant or managed premises).
Before installation can begin, your network provider must secure all necessary permissions to carry out fibre and engineering works on both private and public property:
- In the simplest scenario (i.e. where your business owns the premises and the installation involves a straightforward cable extension), no additional permissions may be required.
- In most cases (e.g. if your business rents the property or if the works cross private land), formal wayleave agreements will be needed. These are legal documents that grant permission to install network infrastructure on privately owned land or within a building.
- For complex installations (e.g. those requiring extensive works across public and private property), you may also need permits from local authorities or third-party organisations (e.g. transport or heritage bodies).
Wayleave agreement process
The complexity of the wayleave process depends on the ownership and management structure of the site. Here’s a typical breakdown:
- You own the site outright: No external access or third-party permissions required. A wayleave is usually not needed.
- Single landlord or simple tenancy: Permission can often be granted within a few days, particularly in smaller buildings with direct landlord relationships.
- Multi-tenant or managed buildings: Requires coordination with freeholders, managing agents, and legal teams, which can take several weeks, unless pre-agreed wayleaves are available.
- Shared infrastructure or multiple stakeholders: If risers, comms rooms, basements, or access routes are shared, the process can become more complex and time-consuming, unless pre-agreed wayleaves are available.
No civil works, cabling, or internal installations can begin until the wayleave is fully signed. While this process is often quick, unresponsive landlords can introduce major delays.
Other permits
In addition to a wayleave, your provider may need to obtain other permits for legal access to public spaces. These include:
- Local authority street works permits: Required for digging on public roads or pavements. Councils usually demand 10–28 days’ notice and may restrict work on high-traffic or protected routes.
- Listed buildings and conservation areas: Additional planning consent is needed for external works. Local planning departments can take several weeks to respond.
- Railways, canals, or private land crossings: Special permissions are required for works affecting infrastructure owned by third parties. These may involve legal and safety reviews and often take additional time to process.
4. Installation works
Timescale: 4-12 weeks
Depends on: Existing ducting, road closures, permitting, weather, and local authority delays.
Once all permissions are secured, installation can be scheduled. This may take just a few days for simple installs or several weeks for more complex engineering projects.
Ensure that your site team provides engineers with full access to all required areas before their arrival.
Standard leased line installation works
In most scenarios, existing ducts and poles already connect your building to the network, meaning minimal work is required. A standard installation typically includes:
- Wall penetration: A small, sealed hole is drilled through an exterior wall to route the fibre inside.
- Pulling or blowing fibre: Fibre is drawn through pre-existing ducts into your premises.
- Indoor termination (handoff): Fibre is terminated in your comms room or cabinet, typically with an RJ-45 or SFP handoff point.
Civil works in underserved locations
If there are no existing ducts or poles available to bring fibre from the Point of Presence (PoP) to your comms room, civil engineering works are required.
These may involve both private and public property. In most cases, the works are limited to your site.
Typical activities include:
- Microtrenching: Cutting narrow channels in tarmac, pavement or building floors to lay fibre ducts.
- Traditional trenching and digging: In areas where microtrenching isn’t viable: such as across soft ground, private land, or long-distance runs.
- Installing or extending underground ducts or overground poles: Providing isolated pathways for fibre cables from the nearest network point.
Installation timeframe
Simple installations can often be completed in a single day. Installations that involve civil works can take several days to weeks, depending on several factors:
- Engineer unavailability: Scheduling delays are common during peak periods, such as school holidays.
- Unexpected obstructions: Concrete foundations or conflicting underground utilities can increase time and cost.
- Third-party coordination: Locked risers, restricted building areas, or delayed landlord coordination may hold up work.
- Traffic management: Some roadworks require temporary lights or lane closures approved by local authorities.
- Permit expiry or re-application: If installation is delayed, permits may need to be renewed, causing further delays.
Once fibre is successfully delivered to your comms room and performance-tested, the installation phase is complete. The line is now ready for final configuration and service activation.
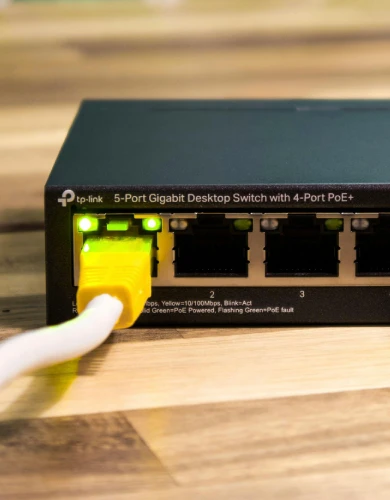
5. Equipment installation and service activation
Timescale: 1-2 weeks
Depends on: Provider’s engineer scheduling, delivery of customer premises equipment (CPE), and site readiness (e.g. power, rack space).
In this final stage, your provider will schedule a visit to install the required network equipment, typically within 5 to 10 working days.
This visit usually takes a few hours and involves:
- Installing an Optical Network Terminal (ONT)
- Installing a multi-WAN business broadband router, if included as part of a managed service
These devices connect your leased line to your site’s local area network and form the handoff point for your IT team.
In most cases, the leased line is activated on the same day or shortly afterwards. Engineers will test fibre light levels and confirm connectivity to the provider’s core network, leaving your team with a live, business-grade connection ready for integration.
What you need to provide:
- Secure comms space or cabinet: A 19″ rack or secure wall space for mounting equipment.
- Power supply: Ensure a live and tested power socket is available at the installation location for both setup and ongoing use
- Clear access to install area: Remove any obstructions (e.g. furniture, stock, partition walls) blocking cable routes
- Nominated contact onsite: A nominated person familiar with the building or authorised to grant access must be present
- Site access: Especially important in managed or multi-tenant buildings, where lifts, risers, or doors may be restricted outside working hours
6. Network integration and go-live
Timescale: 1–3 weeks
Depends on: Internal IT or managed service provider (MSP) availability, network complexity, hardware compatibility, and the level of testing required
Once the leased line has been installed and activated, the final step is to integrate it into your existing local and wide area network environments. This is typically handled by your internal IT team or MSP.
The process must be carefully planned to avoid disruption to business-critical services, particularly when replacing an existing broadband connection or introducing a secondary line for broadband failover or load balancing.
This stage marks the true “go-live” point for your business. Once routing, firewall rules, and network policies are in place, the leased line becomes one of your core business-grade connections, providing high-performance, uncontended internet tailored to your operational needs.
Integration tasks
At this stage, your IT team will:
- Connect the leased line’s handoff (usually an RJ45 Ethernet port) to your firewall, router or network switch.
- Configure static IPs or dynamic IPs, as designated by your provider.
- Configure dynamic DNS routing and test DNS resolving.
- Define firewall rules and network policies to control traffic, protect systems, and enable remote access through VPNs.
- Ensure compatibility with existing VLANs, mesh WiFi networks, and internal switching infrastructure.
- Integrating into SD-WAN solutions, SASE, cloud-based WANs or MPLS environments, where applicable.
- Turn into a dedicated business Ethernet route for specific traffic (e.g. business VoIP phone systems, cloud backups, or inter-site data).
Integration complexity
The time required to complete the integration varies depending on your network environment:
- Small business broadband setups: Straightforward integrations (e.g. one office with standard firewall/routing) can be completed in a few hours.
- Complex configurations: Multi-system integrations (e.g. multi-site SD-WAN, VLAN segmentation, or policy-based routing) may take several days or weeks, particularly if out-of-hours work is required
Integration considerations
Your IT team or managed service provider (MSP) should take the following measures to ensure your integration is successful:
- Test the new connection in parallel with your existing broadband to ensure uptime and compare performance.
- Validate download/upload leased line broadband speeds, latency, and any other SLA performance metrics.
- Confirm the WAN handoff type and IP address scheme in advance with your provider to avoid delays.
- Schedule out-of-hours testing if your network supports 24/7 operations
- Keep your previous broadband line live during transition to allow rollback if needed.
FAQs – Leased line installation
Our business broadband experts answer common questions about leased line installation for commercial and public properties in the UK.
Are there SLAs for leased line installations?
Yes, but they are typically indicative, not contractually binding.
While most providers offer estimated lead times (e.g. “up to 60 working days”), these are considered targets, not guarantees.
Delays caused by factors such as wayleave negotiations, local authority permits, or Openreach availability are usually outside the provider’s control and not subject to penalties or compensation.
Some providers may offer milestone updates or engineer scheduling windows as part of the SLA, but hard deadlines are rare during the installation phase.
What causes delays in leased line installations?
The most common delays in leased line installations come from legal and logistical bottlenecks, not the physical fibre work. These include:
- Wayleave agreements: The most common cause of delays. Waiting for landlords or property managers to sign legal permissions can take months.
- Local authority permits: Delays in approving roadworks, especially on red routes or during council backlog periods.
- Engineer availability: Scheduling delays with Openreach or subcontractors, particularly during busy times of year.
- Access arrangements: Missed appointments, locked comms rooms, or restricted building access on the day of work.
- IT coordination and integration: Delays during go-live if internal teams or service providers aren’t ready to switch over and configure systems.
- Unforeseen site conditions: Blocked ducts, buried utilities, or re-routing needs during trenching.